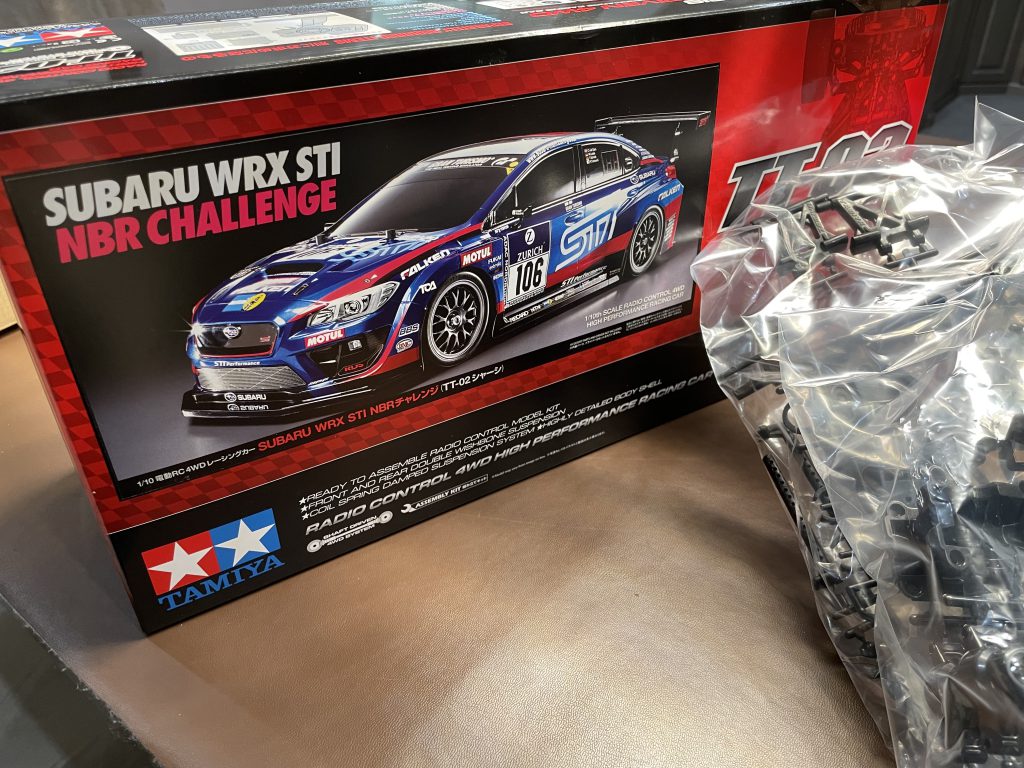
Following my posts over the years, you’ll know I love radio-controlled anything. I have drones, helicopters, a plane, a boat, a lorry and finally, a rally car!
The Tamiya Subaru WRX kit uses the TT02 chassis for those that understand these things… I’m not well up on the differences, but by researching forums, it became the choice to go for.

I used a few hops along the way, such as bearings and prop shaft, and also added a cockpit to the final build, but the chassis assembly was straightforward and, honestly, not very challenging at all.


But next came the polycarbonate shell .. now this was a challenge.
The shell is covered in a plastic film you must leave on until all painting is completed. Removing it would lead to the final finish being spattered with paint and almost certainly scratched.
I used the small spray booth I bought when I built the Scania Lorry by Tamiya, so once again, it came out to help me with the painting.
The surprise of preparing this shell came when I realised the painting was done from the inside. Everything must be masked up and in a specific order so that the layers of paint are seen in the correct places.


Masking up is a real challenge, very time-consuming and requires patience. Despite watching many videos and taking advice from Tamiya forums, I still found some areas where the paint bled slightly after spraying. You must press the edges of your tape firmly to ensure you cut off any micro gaps or crevices.
The spraying didn’t take long, and I followed the kit’s instructions with all the paints, except for the smoked glass, because I wanted the cockpit exposed.
After spraying the various layers and unmasking them bit by bit, the shell was complete. I then took off the film to unveil a stunning metallic blue body.


The kit comes with sheets of decals that require careful cutting out. They tell you to cut very close to the edges of the graphics, and I could see why. Not only would you see unnecessary transparent, extended edges to the graphics, but you would also be using room on the car body you don’t have. It is reasonably forgiving, but my advice is to take your time, do it precisely as it shows, and you’ll end up with a car body to be proud of.


I must give a shout-out too. Jo from Fusion Hobbies supplied the bearings, paints and hop-up parts. Their website is just brilliant, designed for someone like me so that I could see all the parts by choosing the chassis. the prices are very competitive and were all delivered using DPD. Check them out here. They have many RC-related kits, radios, parts and tools.
To begin with, I thought I would use my favourite low-cost orange receiver. which is a DSMX & DSM2 Spektrum Compatible Orange Receiver CM703 7 Channel Receiver 2.4GHz PPM. However, I also wanted to use a surface transmitter. Try as I did, I could not get the receiver to work with the DX 5 Pro, so I purchased a Spektrum SR315 DSMR 3 Channel Sport Receiver instead, and it bound to my transmitter first time.
So the build took me the best part of a month, choosing to take my time and do a little in the evenings.
I love the finished results, and thanks to Jo at Fusion Hobbies managed to use some paint remover with a cotton bud where there was a slight overspray.


